Wet 'n' Wild Wednesday
Summer is hot and kids (and adults) love to cool down with water! Several summers ago, I had a H2O Tuesday that kept the nephews entertained and prepared to play in the lake at the cabin we were visiting. Luckily for me, there are plenty of ideas to keep water activities wild because it was HOT outside! Unfortunately, it was also very stormy, so we had to cut short some activities and alter others the day we played!
Wet ‘n’ Wild Activity
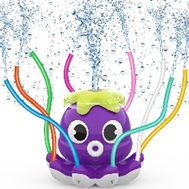
The boys had swimming lessons that day, so they had already been in the pool. So, the plan had been to kept it simple. I think we often forget the simple pleasures of childhood—like running through the sprinkler. So that was the plan for the day. I mean you can spice it up with several versions of sprinkler attachments like this one that was a steal at Target:

You could always keep it even drier by just blowing bubbles if the kids are not wanting to get wet. To make the bubble blowing a little more fun, you can take food dye and color your bubbles so that they are bright and fun as they land around the yard. It is just one way to add some “splash” to a typical summer activity.
Wet ‘n’ Wild Craft
Several years ago, H2O Tuesday for Cousin Camp we created these pool noodle lightsabers.

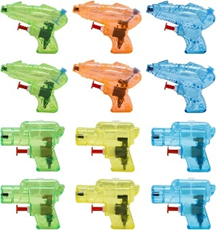
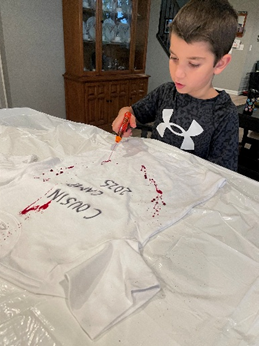
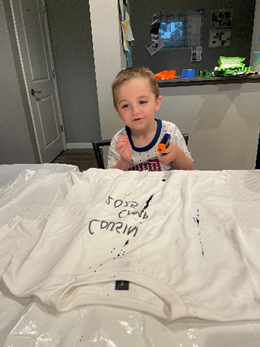
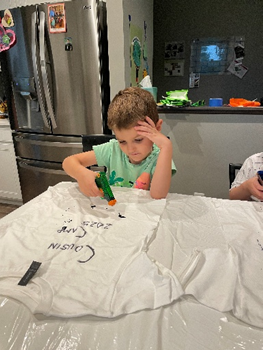
This time I chose to do squirt gun t-shirt painting.
It was so cheap and easy. I used cheap squirt guns from Amazon. They were a dozen for $8.99. I figured that I could use different guns for different colors for each of the three boys.
I also bought cheap T-shirts from Michaels. They actually have a really great line you can use to create multiple projects, but these shirts are the easiest to modify at a cheap price. They are their Make Market brand and the kids shirts only cost $6.99.


Of course, if you have extra white t-shirts sitting around, you could also do those or buy a multipack if the kids are all the same size, like this one on Amazon where you get five shirts for $7.49.
The key to actually dying the shirts is not paint, which was what I assumed when I first started exploring different ways to go about this project. Instead, it is simply food coloring!

The directions, which I found on this site were this:
- Squirt food coloring into squirt gun and fill the rest of the way with water.
- Next, gently shake to mix the food coloring and the water. Do this for all colors.
- After that, lay a white t-shirt flat on the ground in the grass.
- Squirt the t-shirt in whatever designs and colors you'd like.
- Next, let dry in the sun for 30 minutes.
- Lastly, iron the colors into the shirt so they will not wash out!
I would say, add the water to the gun first and then the food coloring, that way the color doesn’t splash everywhere as you add war. #IYKYK
I will admit, I would still keep them in a small separate load the first time washed to make sure there was no bleeding.
Wet ‘n’ Wild Game
Britney and Play, Party, Plan has a slew of water games for kids and adults alike. Providing that many options allows you to peruse ideas that will work for your group. I chose a few options that we will have to save for another day when the rain goes away!
I had water balloons ready, but those will have to wait.
If water balloons have been a staple activity and need a little glow up, Speed Toss is one way to spice up water balloons.
The directions that Play, Party, Plan gave were these:
- The first thing to keep in mind is the goal. The goal is to be the first team to catch five water balloons first.
- You create two “end zones” at either end of the yard with a bucket in each. You also need to put a bucket of water balloons by the start.
- Then your group splits into pairs and line up just like in a classic water balloon toss, one person on one line and their partner on the other line facing them. Give one person a water balloon.
- When you say go, the first player tosses the water balloon to their teammate. And then this is where the game changes. Once they catch the balloon, both players have to run to the opposite side of the yard, touch/pass the line, then run back while tossing the balloon the whole way trying not to drop it before it gets to the bucket.
- Once they reach the end they start the whole process again.
- The first team to catch five (or whatever number you decide) water balloons wins.
The second game I had on hand was Water Balloon Hot Potato. I am not a huge fan of water balloons. I know they have the device to fill multiple now, but they are putsy and the shards that remain in the grass are not good for curious animals, either.
I liked this game as an option because you really didn’t need to fill a lot of balloons.
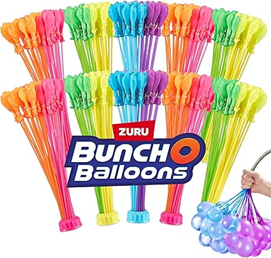
One round of using the Bunch of Balloons and you are set for way more rounds than you will most likely play both games.
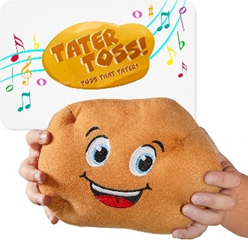
Then it is simply the old classic of hot potato. They try to pass the “potato” and attempt to not have it in hand when the time runs out. Luckily, they had a timer from the game Tater Toss that would have made a great timer!

We chose dry balloon “keep it up” that day as some indoor fun! The old classic to keep it from touching the floor. Again, the simple pleasures.
Wet ‘n’ Wild Snack
Snacks for the wet ‘n’ wild can be as easy or as simple as you choose. One idea is to turn the Wet n’ Wild Wednesday into a party and invite the neighborhood kids. In that case, if you are looking to feed a crew there are a couple of cute recipes you can offer the little people who will most definitely be working up an appetite.
You could make these super yummy and cute “Sand” cups. They are similar to dirt dessert, only “blonde.”
Of course, the queen of party time herself is the maven of this idea over at Play, Party, Plan.
This is her recipe:
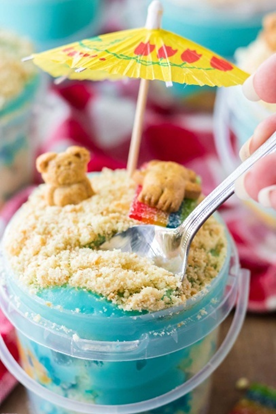
Sand Pudding Desserts
Get beach ready with these cute sand pudding buckets! Layers of fluffy white cake, blue cheesecake pudding, and crushed cookies in a sand pail bring this summer treat all together.
Equipment
- 10 (8oz) clear mini sand buckets
Ingredients
- 1 (15.25oz) box white cake mix
- water according to box instructions
- oil according to box instructions
- eggs according to box instructions
- 1 Lemon
- 2 (3.4 oz) boxes cheesecake instant pudding
- 4 cups cold milk
- Blue food coloring
- 1 ½ tbsp blue sprinkles
- 1 ½ cups crushed vanilla wafers 30-35 Vanilla Wafers or 60 Mini Vanilla Wafers
- Teddy Grahams
- Rainbow stripe candy Extreme Airheads
Instructions
- Preheat the oven to 350 degrees. Then prepare a 9x13 baking dish by spraying it with nonstick spray.
- Combine the cake mix, water, oil, and eggs in a large bowl according the box cakes instructions. Then add the juice of one lemon to the bowl and blue sprinkles.
1 (15.25oz) box white cake mix,water,oil,eggs,1 Lemon
- Pour the cake mix into the prepared 9x13 baking dish. Then bake for 45 minutes. Once the cake is done baking insert a toothpick into the cake To make sure it’s done.
- Cut the cake into small bite sized squares. Let the cake cool.
- Combine the cheesecake pudding mix and the milk. Whisk the ingredients together. Add in the blue food coloring until it’s at a color you like. Then mix in the sprinkles.
2 (3.4 oz) boxes cheesecake instant pudding,4 cups cold milk,Blue food coloring,1 1/2 tbsp blue sprinkles
- Line 10 buckets up and add a slice of cake to each bucket. Then evenly distribute the pudding on top of the cake.
- Sprinkle the crushed vanilla wafers over the blue pudding.
1 1/2 cups crushed vanilla wafers
- Garnish the sand pudding dessert with a Teddy Graham laying on top of a strip of the rainbow candy as a towel, other Teddy Grahams hanging out, and/or a drink umbrella on top.
Teddy Grahams,Rainbow stripe candy
- Serve immediately or chill until serving if not serving immediately.
Notes
Make the cake and pudding ahead of time so it is ready to go when you are wanting to assemble it. Then just assemble it right before you’re ready to serve.
Wait to put sand and decorations on until you are ready to serve so the crumbs don’t become too mushy.
Skip the sand pails if you’d prefer and use any clear plastic cups for the same sand pudding dessert, just not quite as cute.
Store in the fridge for up to three days, if there is not a layer of sand on the pudding, cover with plastic wrap.
I chose to simplify the above recipe with a twist on the classic dirt dessert. I bought vanilla pudding cups, Cool Whip, and Golden Oreos as well as some blue dye. We dyed the cool whip blue and spooned it into the bottom of clear plastic containers. We layered the pudding on top for sand and added the texture by crunching up the Oreos on top. We added some Swedish Fish voila! A day at the beach!
It is a little easier for little ones to participate in creating and way easier for clean up too!
Plus they had so much fun designing their own “waves!”


Wet ‘n’ Wild Book
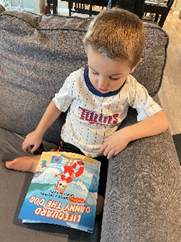
My parents live on the lake and the nephews love swimming in the lake. Of course this is concerning for all adults involved for safety reasons. They all take swimming lessons and are practically fish, but water safety is always a concern. I wanted to address some of those with the boys with a book. I ultimately chose Lifeguard Danny the Dog: Essential Water and Safety for Kids. It was a fairly good reminder for swimming in open water, and even though it isn’t the ocean the lake could feel big to little people.

Lifeguard Danny the Dog: Essential Water and Safety for Kids $10.05 on Amazon.
With the storms outside we altered, an unexpected “growth mindset” lesson and a great way to keep them off the screens!
*As an Amazon Associate I earn from qualifying purchases.